
Capturing high-quality dental impressions
Accurate impression data is critical for the success of the aligner treatment. In the absence of models acquired directly via an intra-oral scanner, high-quality PVS impressions must be generated. Following desktop scanning, such impressions (or the resulting physical models) are transformed into submission-ready, 3D models. The process for obtaining such impressions is as follows:
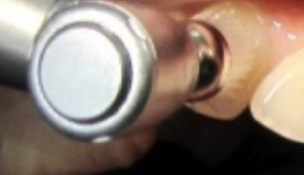
Step 1: Thoroughly clean the teeth
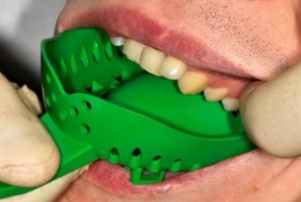
Step 2: select necessary tray sizes for upper and lower arches, each tray should be slightly larger than actual arch size, having approximately 2-3 mm overlap with wisdom teeth. Ensure trays are at the right distance from the soft tissues. Lips should be free to close the bite.
Step 3: fill in the mandibular tray with PVS-material, ensuring the tray is full but not beyond its capacity. Insert the tray and when in the patient’s mouth, place it on the midline. Select plot spoon first for the anterior teeth, ensuring lips are not hampered. Then select the plot spoon for the posterior teeth. Apply continuous, uniform and adequate pressure in all sections. Move the cheeks away from the tray. Before removing, make sure that the impression material is fully and evenly distributed. Follow the manufacturers’ recommendations.
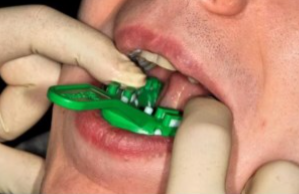
IMPORTANT: DO NOT REMOVE YOUR HAND FROM THE TRAY BEFORE THE SPECIFIED TIME HAS LAPSED! Using a scalpel, trim all primary undercuts, preventing correct positioning of the trays Fill evenly the primary paste of the PVS-layer material. Place the tray in the mouth in the original position.
Wait a few minutes according to the manufacturer's instructions. When ready, swipe your fingers across the gums in the posterior segment and pull the tray out.

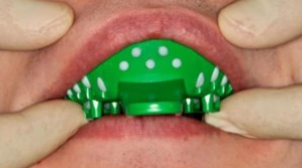
Step 4: fill the upper trays with sufficient base layer for full palatal registration, ensuring the tray is full but not beyond its capacity. Insert the tray inside the mouth. When inside, make sure the tray is positioned on the midline. Select plot spoon first for the anterior teeth, ensuring lips are not hampered. Then select the plot spoon for the posterior teeth. Ensure continuous, uniform and adequate pressure on the tray.
Move the cheeks away from the tray to ensure the oral cavity is accurately replicated. Prior to removing the material, make sure that it is fully and evenly distributed. Follow the manufacturers’ recommendations.

IMPORTANT: DO NOT REMOVE YOUR HAND FROM THE TRAY BEFORE THE SPECIFIED TIME HAS LAPSED Using a scalpel, trim all primary undercuts, preventing correct positioning of the trays. Fill evenly primary cast of the PVS-layer material. Place the tray in the mouth in the original position. Wait a few minutes according to the manufacturers’ recommendations. To remove trays, swipe your fingers across the gums in the posterior segment and pull the tray out.
Step 5: Capturing the bite registration to describe the vertical occlusion. Let the patient first clench the teeth without removing the casts. Place the material on the occlusal surface of the teeth and distribute from one tooth to another (for the entire arch). Explain to the patient that the teeth must be closed in a way that the tongue is pushed to the back of the palate. Set the time by following the manufacturer's recommendations.